
Do you want to add pages to your WordPress menus? If yes, then this guide can help you! I am handling too many websites on WordPress and know the importance of having a good menu. That’s why I have created this guide to help you add different items to your WordPress menu.
As a blog owner, you also know how important it is to have a well-organized navigation structure. One of the ways to achieve that is to add pages to WordPress menus. Adding pages is not just great for your navigation structure, but it can also give readers a more linear experience.
Adding pages to WordPress menus is not a tough task but can be confusing for the new user. This blog is a step-by-step guide that will help you navigate through the process of adding pages to your menus with ease.
Let’s start the guide!
What is a Navigation Menu?
A navigation menu is a set of pages that help users move around a website. It typically appears as a horizontal or vertical list of links and can be found on every page of a website. A good navigation menu is easy to use and helps visitors find the information they’re looking for quickly and easily. It can be used to navigate between different sections of your site.
The location of the menu depends upon your WordPress theme. However, most WordPress themes come with a primary menu at the top of your website.
Importance of WordPress Menus
The navigation menu is one of the most important aspects of any website. It is the primary way that visitors navigate around the site and find the content they are looking for.
A well-designed navigation menu can help visitors quickly find the information they need, while a poorly designed menu can be confusing and make it difficult to find what you are looking for.
There are a few key things to keep in mind when designing a navigation menu:
- The menu should be easy to understand and use. Visitors should be able to quickly find the information they are looking for without getting lost.
- The menu should be consistent across all pages of the site. This makes it easy for visitors to navigate the site, no matter where they are.
- The menu should be responsive, so it works well on all devices. Visitors should be able to use the menu on any device, including mobile phones and tablets.
By keeping these things in mind, you can create a navigation menu that is both effective and user-friendly.
How to Add Pages to Menu in WordPress
Adding pages to WordPress menus is very simple; you just need to follow a few steps, and you are all set to add different pages to your menus.
Below, I have listed how easily you can add pages, categories, and even custom links to your website menus. Let’s see each section one by one.
1. Adding Pages to Menu
First, let’s see how you can add any page to a menu. You can find all your pages by visiting “Pages > All Pages”. Further, just follow the below steps:
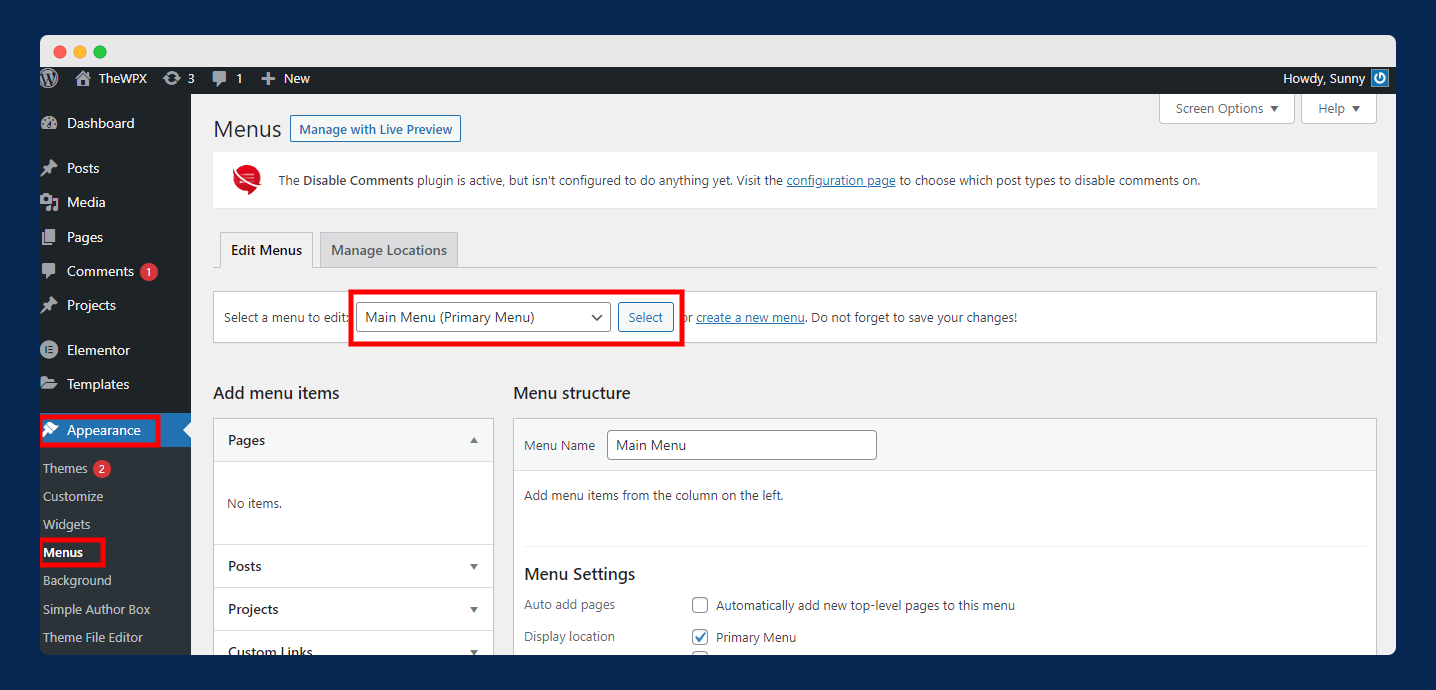
To do this, navigate to “Appearance > Menus” and select the menu to which you want to add pages (only if you have more than one menu on your site).
Now, you have to select the pages that you want to add to your menu. Here, you will have three options:
- Most Recent: This tab shows the most recent pages that you have created.
- View All: This tab displays a list of all pages your website has in alphabetical order.
- Search: This tab allows you to search for any page. It is very important if your site has hundreds or even thousands of pages. You can find any page by searching for a keyword.
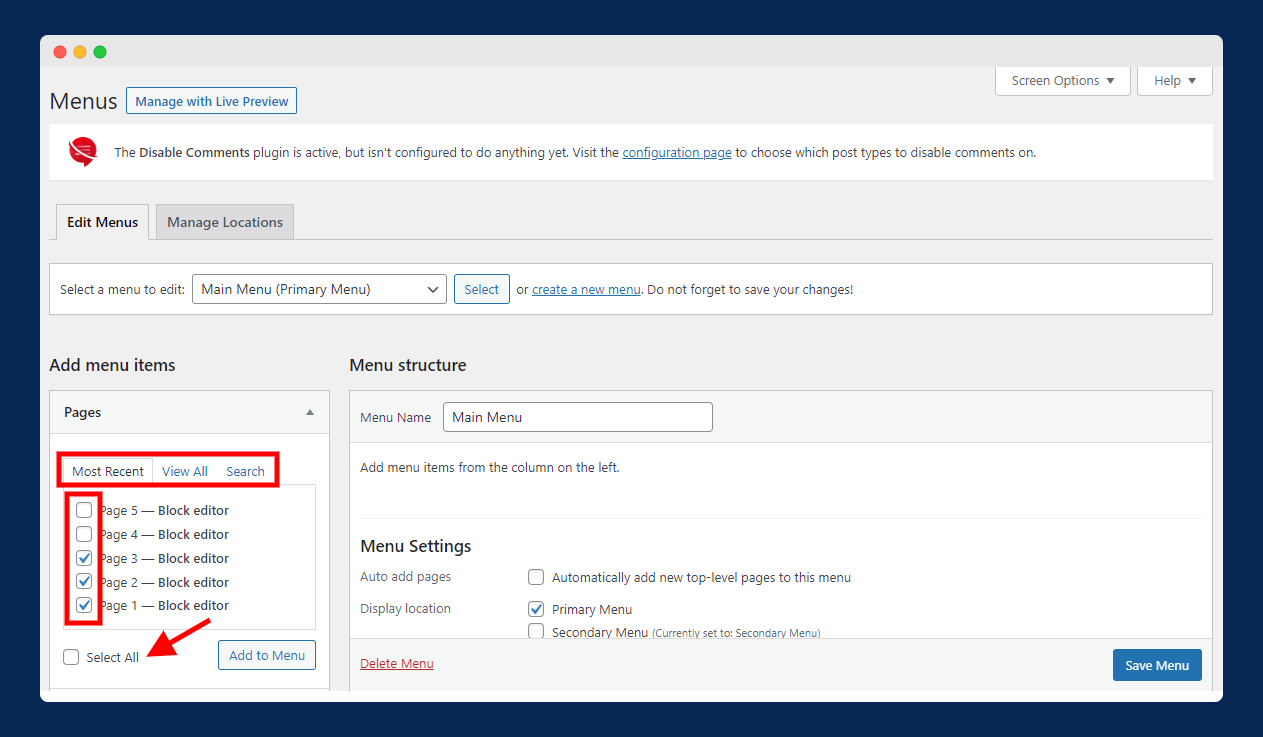
After finalizing the pages, check the box (as shown in the above image). You can also select the “Select All” option to select all pages instead of choosing one by one.
Next, click on the “Add to Menu” button. After that, those pages will display under the menu as you can see in the above image.
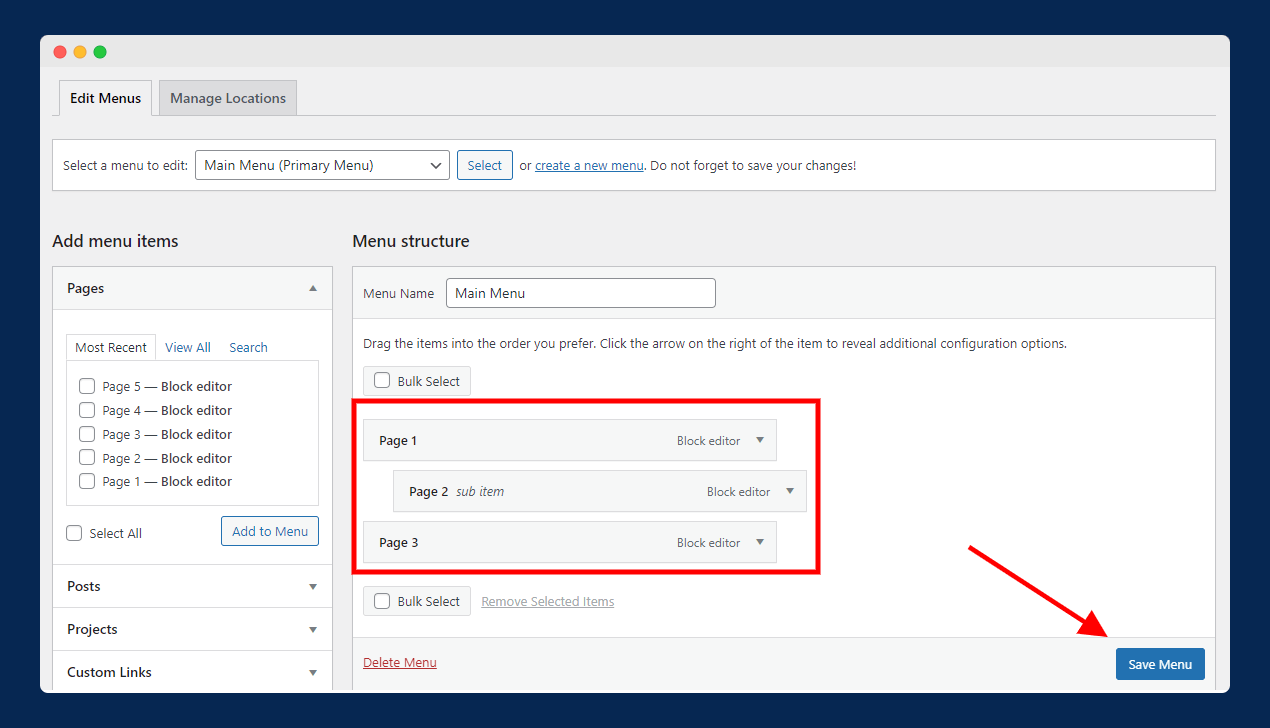
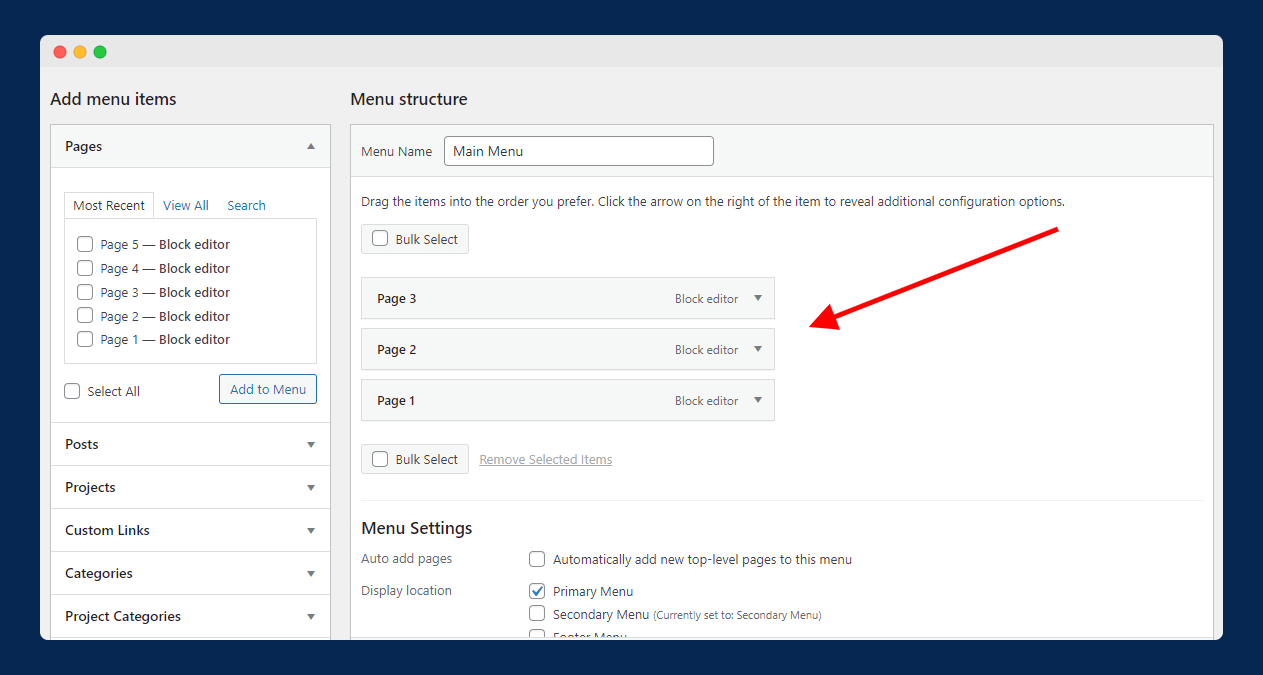
Now, you can arrange the added pages as you want by dragging them up and down. Also, keep in mind that you can also make any page a sub-menu by pulling it to the right underneath its parent page. After making all the changes, simply click on the “Save Menu” button to save your menu.
This is how your menu will look on the live website:

2. Adding Categories to Menu
The process of adding categories to the WordPress menu is very similar to adding pages. Sometimes, you have to want visitors to visit your website’s category directly, and in this case, you have to display categories in your menu.
For example, if you have an eCommerce website and want visitors to visit different collections of your store, then you can display them on the menu. Now, assume that you have a clothing website so that you can display different categories on your menu, like Men’s Clothing, Women’s Clothing, Kid’s Clothing, and so on.
What do you do in this case?
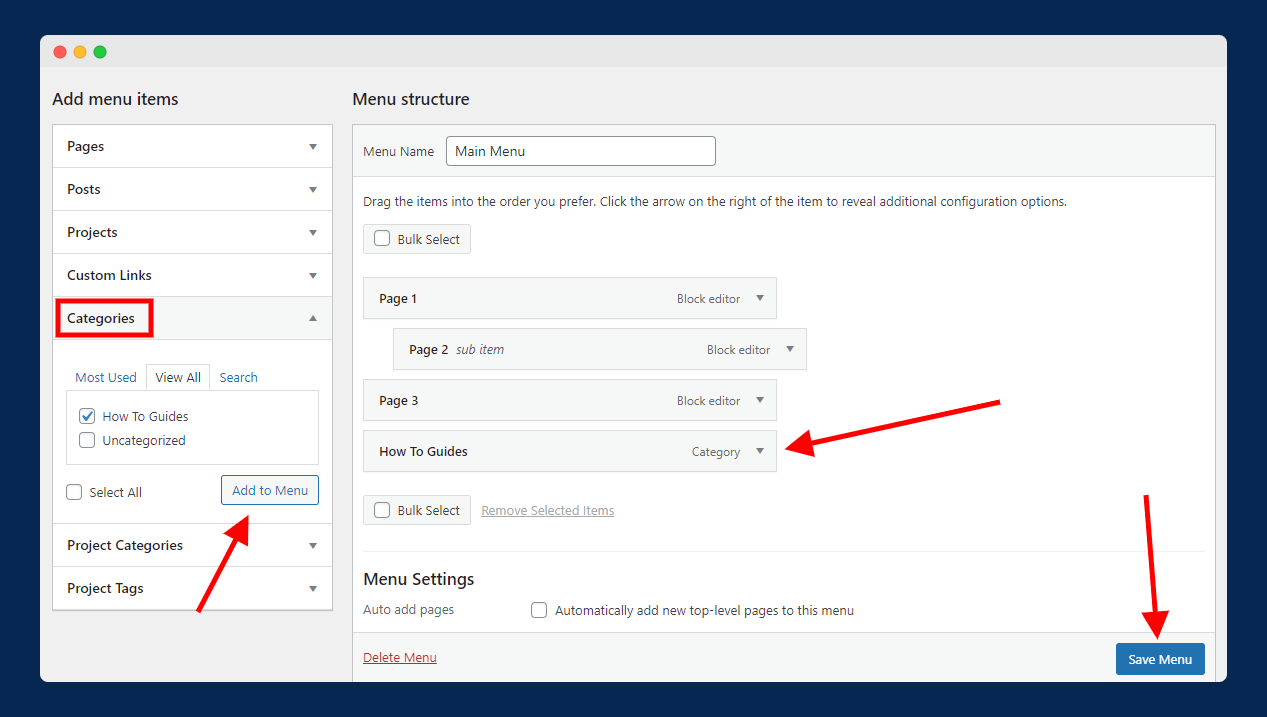
In this case, you need to add your categories to the menu and to do this; you need to navigate to “Appearance > Menus” and select the menu you want to edit.
Now, choose the categories that you wish to add and tick the checkboxes. After that, click on the “Add to Menu” button. You can also drag menu items to position them as you want.
3. Adding Custom Links to Menu
Aside from pages and categories, WordPress also allows you to add custom links to your menu. You can make use of this feature to display your social media profiles or any other website.
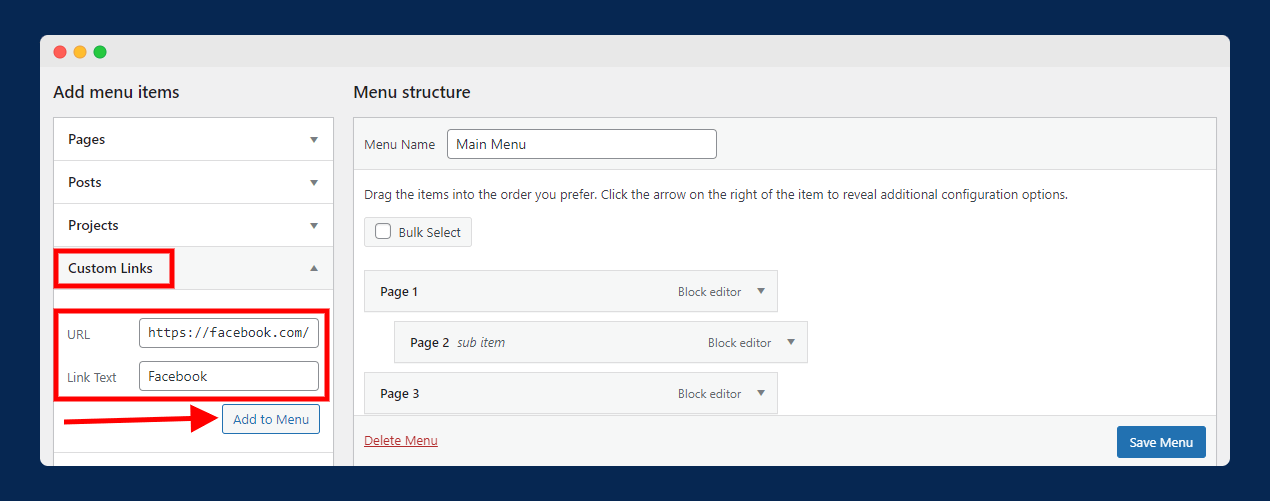
To see it in action, select “Custom Links”, enter the URL along with the text that you want to display under the menu, and click on the “Add to Menu” button.
How to Edit & Remove Any Item From WordPress Menu
After adding pages, categories, or custom links to your menu, you are also allowed to edit or remove any menu item you want. For example, by default, WordPress uses the original title of the page to display under the menu. You can change it if you want.
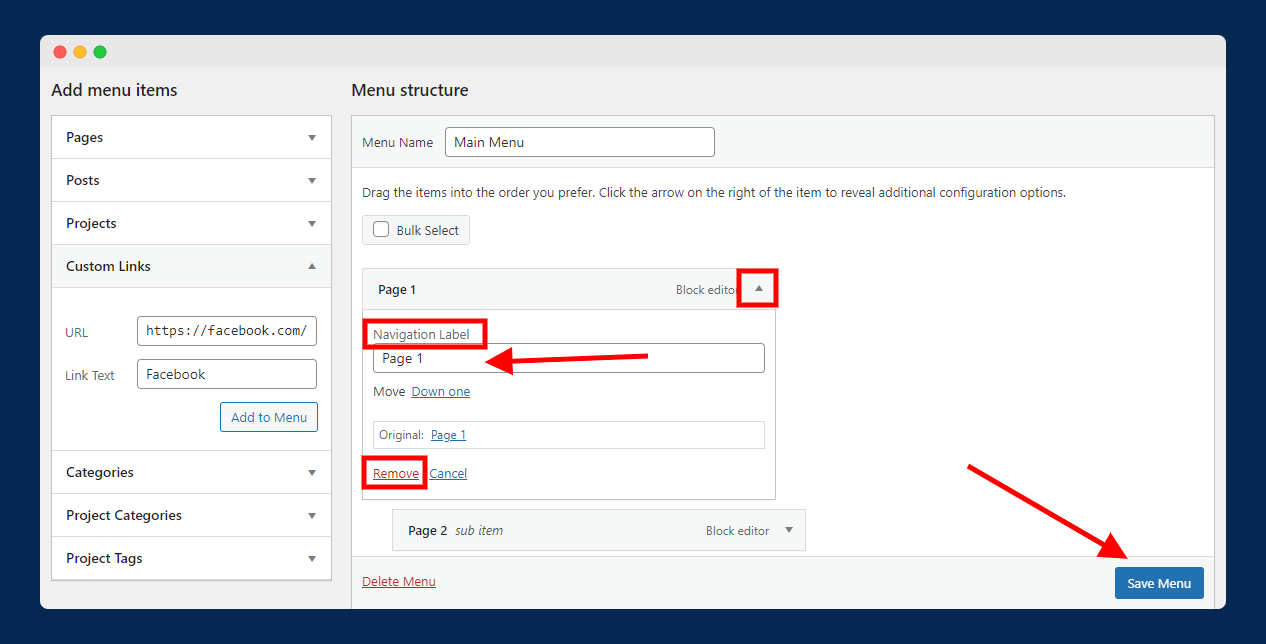
To do this, simply click on the downward arrow next to the menu item name and enter a new name under the “Navigation Label” field, as shown in the above image.
On the same screen, you can also remove any item from your menu by clicking on “Remove”.
💡 Recommended Readings…
Final Words
Adding pages to WordPress menus is not a very difficult task. But, if you are a beginner, it can be confusing for you to do this task. The above guide is created keeping beginners in mind; you will find easy-to-follow steps in this guide.
I hope this blog post has been helpful! Please share your thoughts on this topic in the comments section below. If you found this post helpful, please share it with your friends.
