
If you’re someone who often works with WordPress or writes about it, you must be familiar with a file called “wp-config.php” or “wp-config-sample.php“.
This file is super important for your WordPress site because it has all the details about your website and where it stores its data. It’s like the key to telling WordPress how to talk to the place where all your website’s information lives.
Now, there’s this line in there, “define('DB PASSWORD', 'password here');“, which is where you keep the secret password so that WordPress can safely get into the database.
I’m going to guide you on how to set up your WordPress site by yourself using this wp-config.php file.
So, let’s get started, and I’ll show you how it’s done…
How to Make Database Connection in WordPress?
As discussed earlier, wp-config.php is one of the most important files on your website and is located in the root directory of your WordPress installation.
If you’re manually installing WordPress on your server, then this is the file where you need to add your database details to install WordPress.
The format for defining your database connection looks like this:
These are the basic parameters you need to specify in order to connect to your database.
Let’s take a look at each one:
- DB_NAME: This is the name of the database that you created for manually installing WordPress.
- DB_USER: This is your database username. It is used to access your database.
- DB_PASSWORD: This is the password for the database user you’ve created before. It is used to authenticate the DB USER to the DB NAME.
- DB_HOST: This is the address of your database server. It is usually “localhost,” but in some cases, it could be a different address.
Now that you know the basics of database connection, let’s see how you can connect your WordPress website to a database.
To connect your database and install WordPress on your website, you need to download the latest version of WordPress from its official website. After that, upload the WordPress files to the root directory of your website (e.g., public_html in most cases).
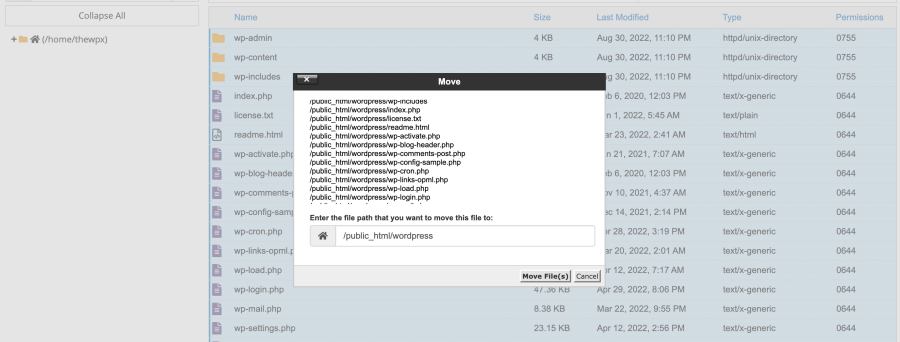
Once the files are uploaded, unzip them and move them from the “wordpress” folder to the “public_html” folder. After that, delete the “wordpress” folder to make your file manager look neat and clean without too many garbage files and folders.
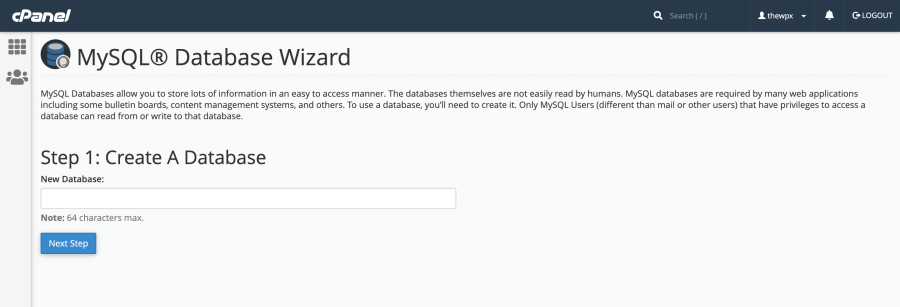
Now, you need to create a MySQL database and user. You’ll need to save the details and then assign the user to the database.

Rename “wp-config-sample.php” file
Once you’ve completed this, rename the “wp-config-sample.php” file to “wp-config.php” and enter your database details there. After you’ve added your database details, you can open your website, for example, example.com, and you’ll see the WordPress installation page.
Simply enter your site details, and you’re ready to go!
💡 Recommended Readings…
Final Thoughts!
In conclusion, the line that goes “define( ‘DB_PASSWORD’, ‘password_here’ );” in the wp-config file is where you put your WordPress database password. I always tell people to pick a strong password to keep your database safe from people who shouldn’t have access.
When you’re setting up a password, you should make sure it’s at least 8 characters long and has a mix of big and small letters, numbers, and special characters. Don’t go for something easy like your birthday or simple words that can be guessed quickly. Also, it’s not wise to use the same password for different websites.
I really hope you found this article useful. If you did, go ahead and share it with your friends and family.
