
We all know the importance of optimizing headings on our website. The one you see just above right now— it did click your attention to read more. Didn’t it? That’s what I will discuss today with you, dear readers. Customizing heading styles, especially in themes like Divi, isn’t rocket science, but it needs to be done in a systematic way.
We will go through heading fonts, their font size, typography, and color, setting different colors for different devices, as well as other personalized heading choices. Let’s get started to explore all these (if you’re looking for a divi discount, click here).
You can easily make your titles much more attractive by using cool headings to convert mere visitors to actual customers.
And moreover, if you’re running a blog, then choosing the proper heading customized can make all the difference. You need to know everything from how to select font style and change it for different devices. This is a chance for you to provide your customers with a great experience and turn them into your leads.
You can customize headings in the Divi theme and page builder in a few different ways, including:
- Customization of headings from the WordPress theme customizer
- Customization of headings using Divi builder
- Customization of headings using CSS code
Before we delve into the specifics of customizing headings using the Divi theme, let’s cover why it’s so important to pay attention to and perfect your heading customization.
Why Should I Customize the Heading?
As I have already said before, heading customization performs quite a pivotal role in the website user interface. Here are a few reasons for that:
- Increase Readability: This will help you to make your content more readable while a customized heading will get the attention of the visitor and will quickly read what you want them to read. Besides, you can choose interesting fonts for your headings and then generate them with the help of tools like Quicktools.
- Accessibility: As you have the best vision, it is not necessary for all visitors to have perfect eyesight. Therefore the title font size needs to be bigger and bolder for those people with poor eyesight.
These are just a few of the dominant reasons for customizing your headings. Actually, your heading acts as the main entrance to your blog or website. Making it unique and attractive can affect how your readers perceive your website as a whole.
Ways to Customize H1, H2, H3, H4, H5 & H6 Headings in Divi Theme
Now let us see all three ways how you can customize headings in the Divi theme:
1. Customization of Headings from the WordPress Theme Customizer
The first method is customizing your headings from the WordPress Theme Customizer itself.
Firstly, make sure you are logged in to your WordPress website. Scroll down, and you will find the Divi option in the WordPress dashboard.
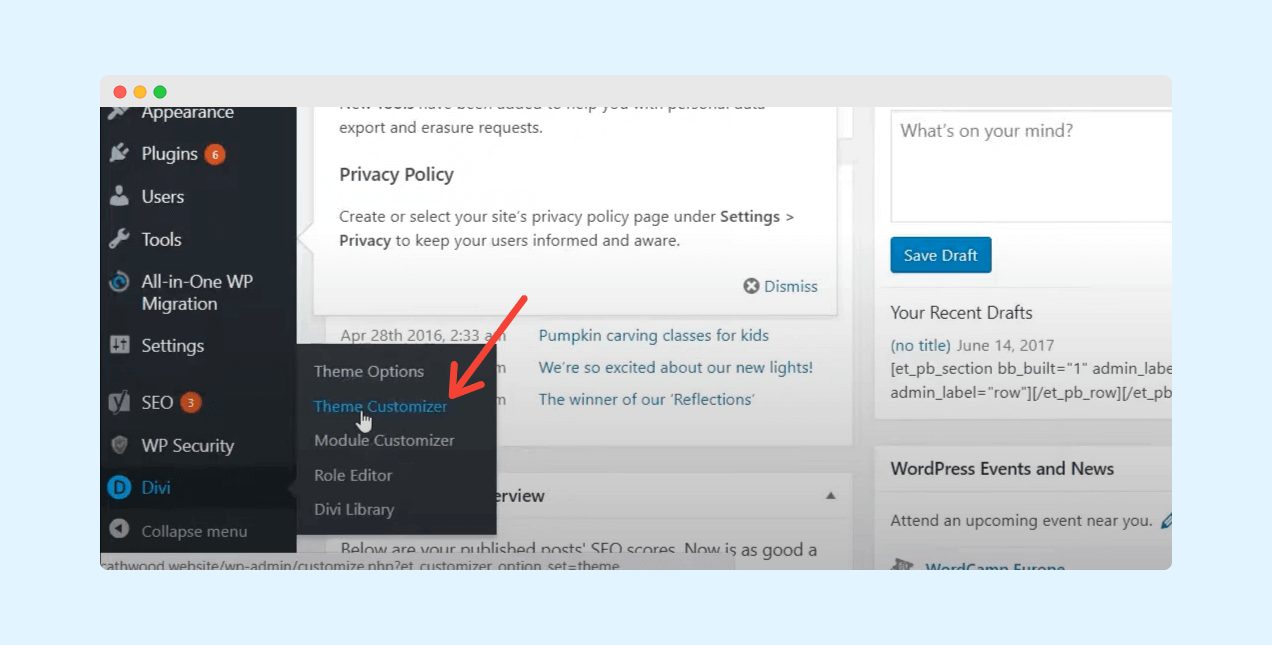
Hover over it and then click on Theme Customizer; you will be taken to the Customizer Page.
You are supposed to select the first option, General Settings >>, after which you can fine-tune the headings from the Typography section. You will be able to change the heading font, font size, color, and many other things.
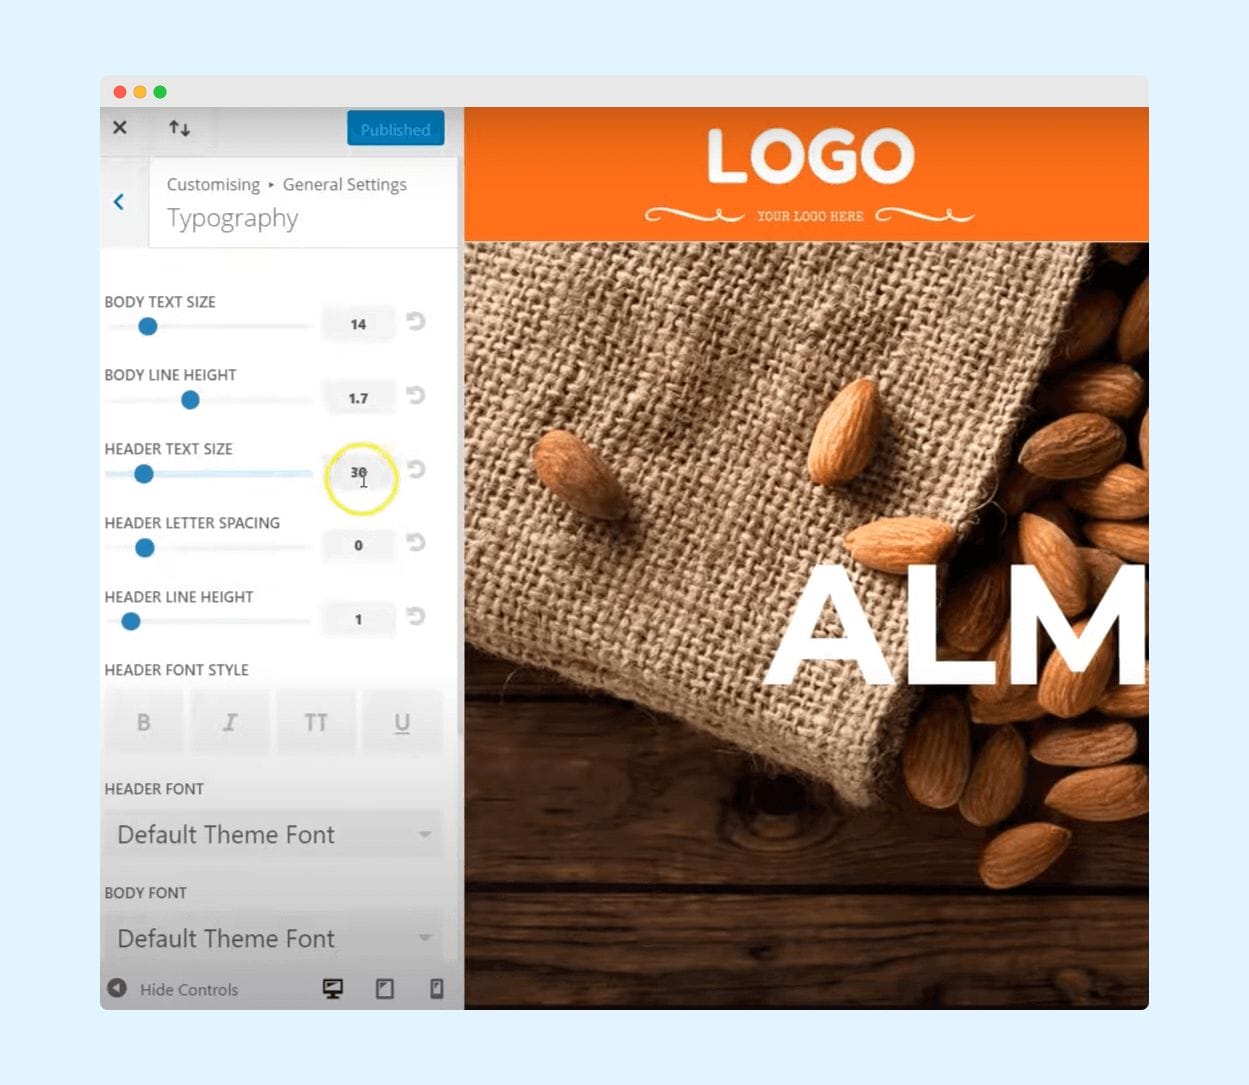
Check all the settings properly, make all the necessary changes, and click on the Publish button. Here your changes will be saved.
💡 Keynote:
Divi Theme doesn’t permit changing the font size of H1, H2, H3, H4, H5 & H6 headings differently using WordPress Theme Customizer.
And as you change the Header Text Size, the size of all the headings will be changed in a ratio. So, to customize each heading separately, you need to use Divi Theme Builder.
2. Customization of Headings Using Divi Builder
The next method includes using the Divi Builder. This method offers more options to customize your headings as you are not restricted to ratio problems. You can easily customize a single heading as per your choice.
However, using the Divi Page Builder for the first time may be a bit challenging as you have to work on each heading separately. That’s what makes it a good option, as you can customize headings as you wish. Let’s see how you can do it:
To get started:
- Log in to your WordPress dashboard.
- Hover over Page and click on All Pages.
- Open the pages you want to edit
- Click Edit with Divi Page Builder.
You can make your own choice: edit the heading or Create a new one (text block). I have already added the heading. Then, simply hover over the heading and click on the Settings icon, as shown in the figure below.
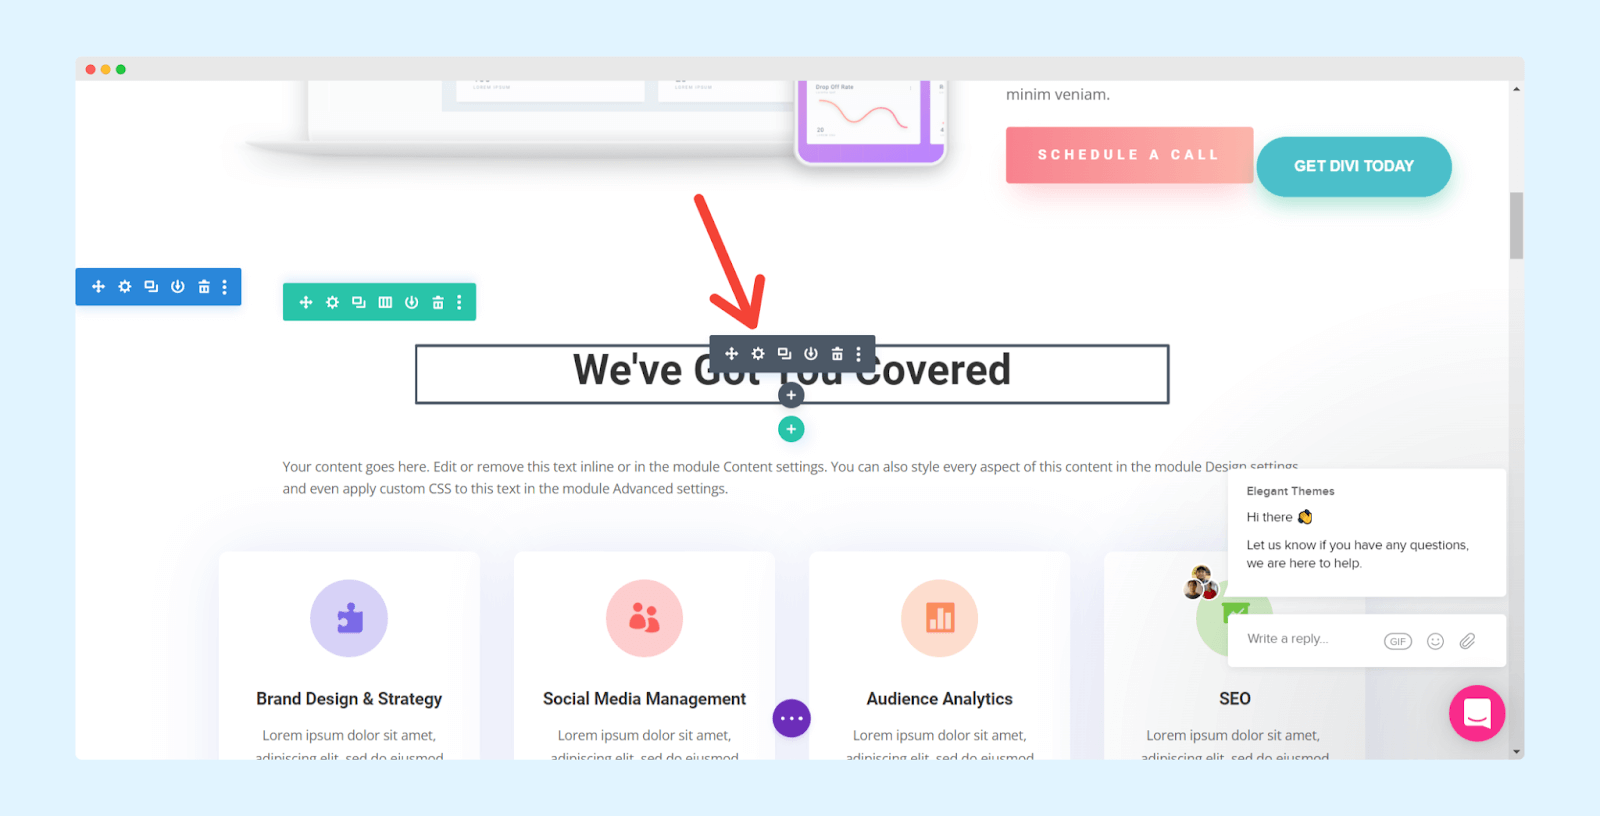
When you click on the Setting icon, the popup will open. From here, you can customize the heading entirely, change from font to font size, change from heading color to heading background, and do many other things.
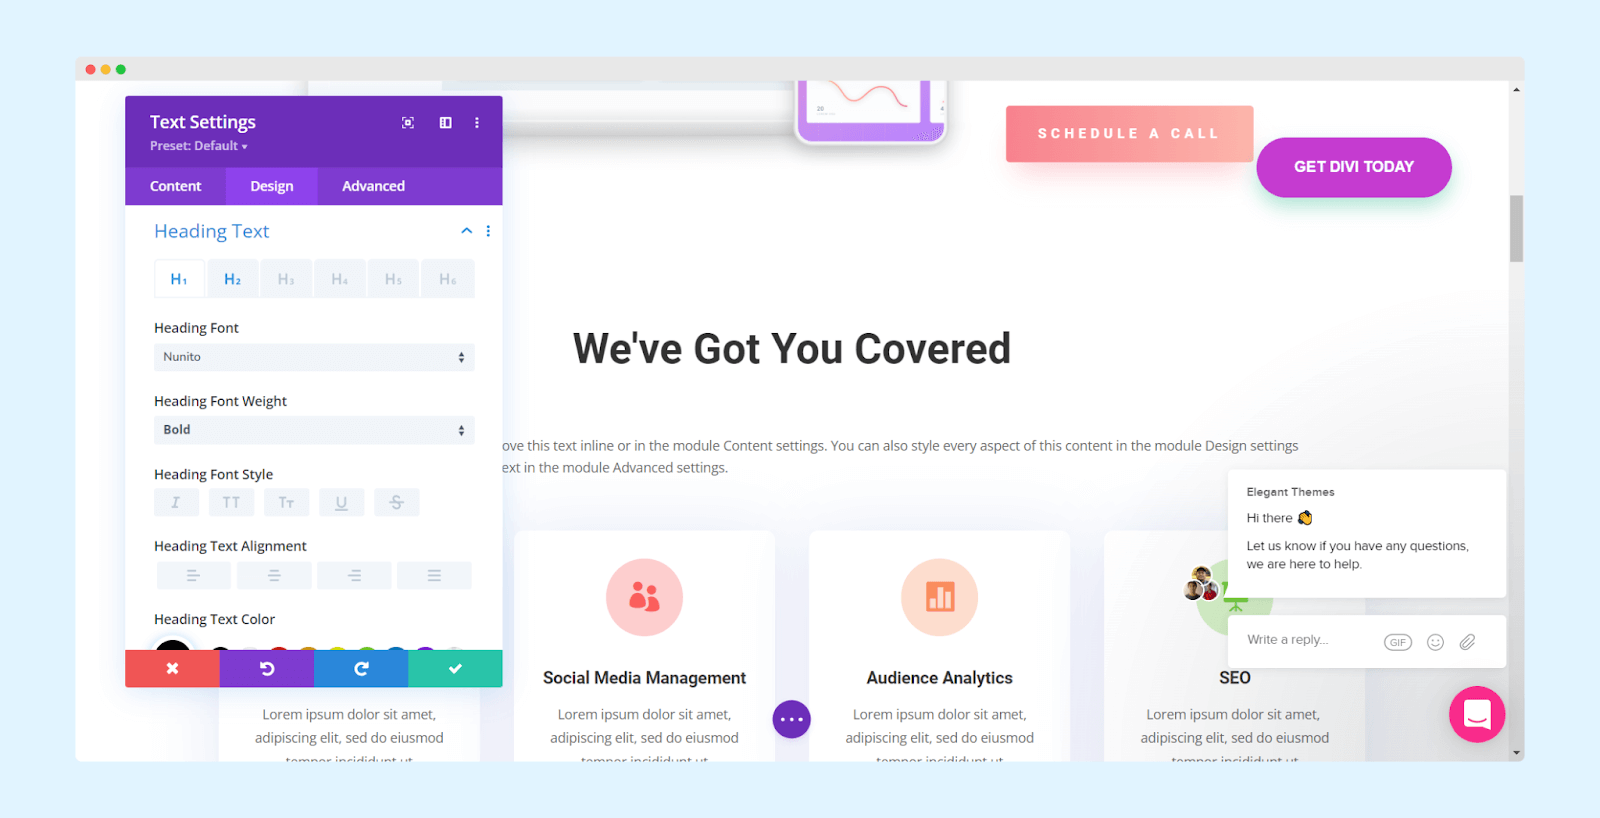
It is all that is needed, you just have to make sure the tabs – Content, Design, and Advance – are corrected and all the customization options are present here.
3. Customization of Headings Using CSS Code in Divi Theme
Customizing Divi headings is super easy using the CSS code. I have scripted and posted the codes below; all that you need to do is just copy and paste the codes into the Additional CSS section of your Divi theme. Let’s see how you can do it:
First things first, login to your WordPress website using your correct login details; hover your mouse over Appearance, and then click on Customize, you will be then redirected to the WordPress customizer.
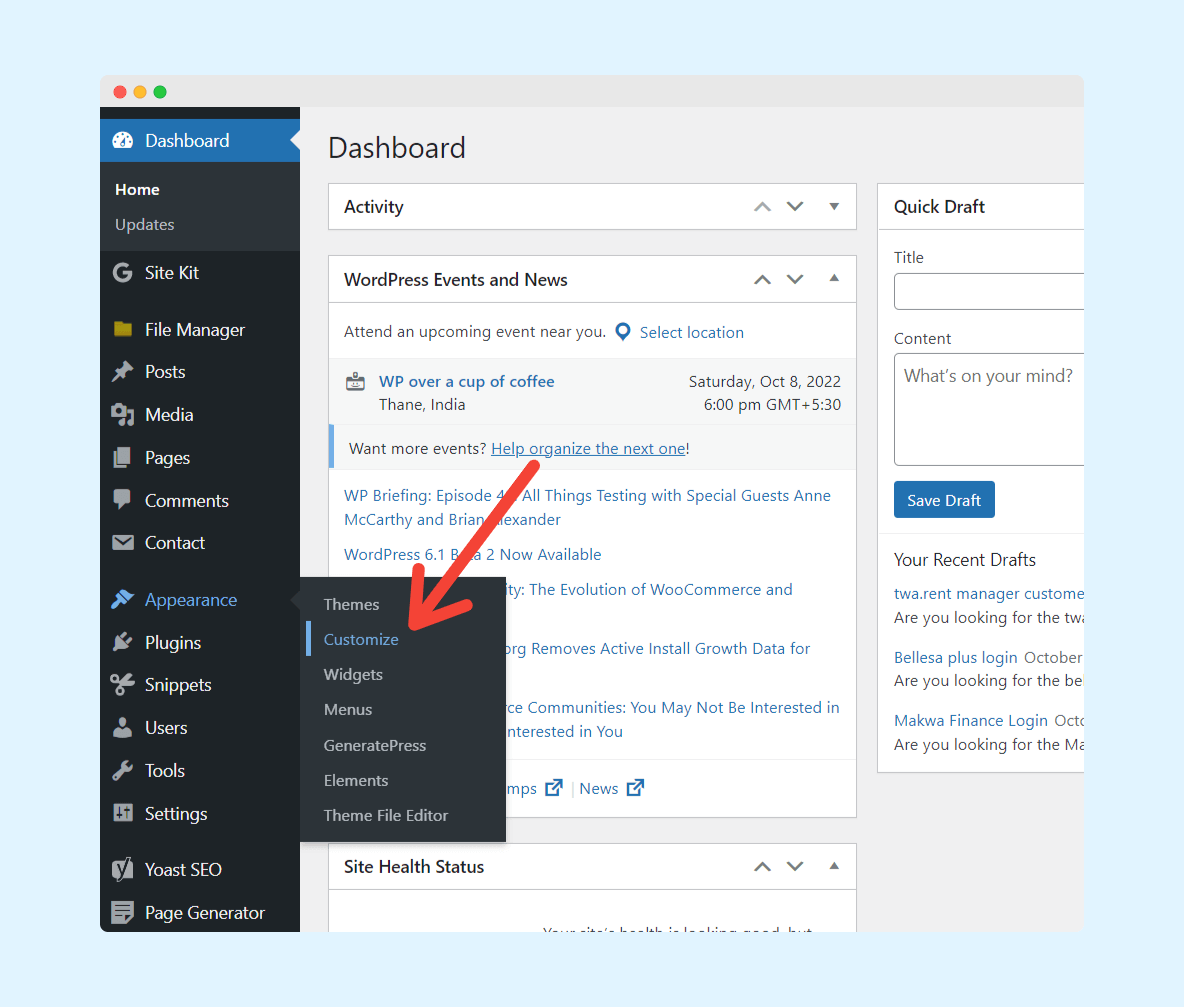
Scroll down to Additional CSS and click on it. Here, you can paste the CSS that I have listed below and then click on Publish. Your website heading will be customized accordingly.
To change the code as per your needs, you need to follow some CSS properties and change their value. That’s it. Let’s see the properties in detail and what values you can update them to:
- color: It symbolizes the color of the heading and you type the chosen color name, or you just type the code here to select a color.
- font-weight: Here, you can assign a number of weights and bold, light, regular etc.
- font-size: CSS enables you to alter the heading’s font size; font size may be: px, em, or %, for instance, 34px or 2.4em.
- font-family: You can use a button for that then opt for a font you want.
- text-transform: Alter the styles of subtitles by capitalizing them in either uppercase, all lowercase, or as normal.
At the time of customization, please be careful, especially if you don’t know how to code.
Final Words
This is how you can customize the headings H1, H2, H3, H4, H5, and H6 in the Divi theme in three ways which are using Divi builder, using Divi customizer theme and using CSS code.
I recommend adopting the appropriate font and colors as well as the font size that works well for devices with different screen sizes. If your website typography is not right, your visitors will not be given their expected experience.
I hope this article helps you to change and customize as per your preferences.
